When you're practicing with your pictures, always work on a copy of your original picture. Open your file and immediately Save As a different name. That way if you experiment until you totally alter the picture, you won't accidentally lose the original.
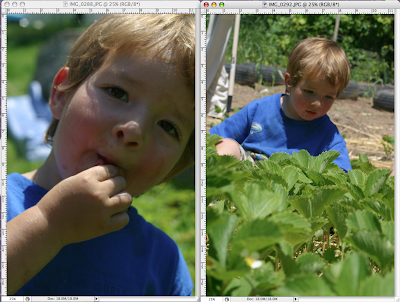
For this first technique, we're going to brighten up a picture where there are dark shadows. Lots and lots of pictures have this problem and it's sure frustrating to lose the details in shadow - especially faces! Usually these are shadows from intense, overhead sunlight. Since people turn away from the sun, the shadows tend to make eyes look dark and hooded or even obscure the entire face. For an example, I'm going to use these two pictures.
 You don't want to increase the brightness. Although this will lighten up the shadows, it will also bring up the already-bright areas and make them look hot and blown-out. Instead we're going to use Levels. This technique is surprisingly easy. Simply chose Image -> Adjustments -> Levels.
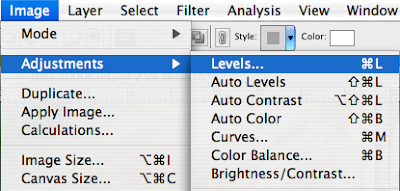
It will bring up a series of slider arrows and a fancy-looking histogram, like this:
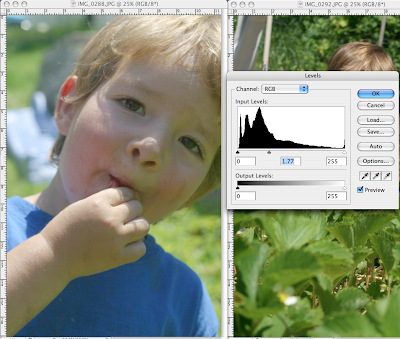 The left arrow controls the shadows and low-lights of the picture. It will make the darkest areas darker. The right arrow controls the highlights and will make the whitest/brightest areas brighter. For shadow-reduction, we are mostly concerned with the middle slider. As you can see, I've moved the middle slider to the left, brightening up the midtones of the picture. Make sure that your Preview box is checked. The nice thing about these slider arrows is that you can just move things around until your picture looks right. There's no guesswork! If you mess something up, just cancel out and start over.
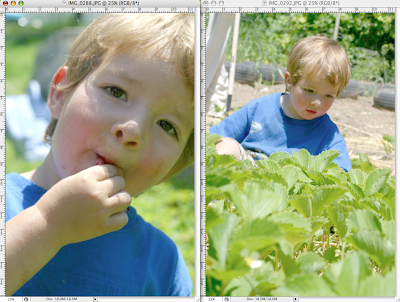 If you notice that the whole picture is getting too light, you can bring the left slider down and darken the low areas a bit for contrast. After you've brightened the midtones up a little, you can try Brightness/Contrast a little bit too see if it makes an improvement. Just move everything around and see what it all does. Pretty neat yes?
If you have questions, go ahead and post them in the comments. Be sure to include any techniques that you are interested in learning.



4 comments:
I am wondering what PS program you are using? I am really looking forward to learing some new technique, thanks for doing this!
I'm using Adobe Photoshop 10.0.1 (Creative Suite 3). I'm trying to make all the instructions simple enough that you can do all the steps on an older Photoshop, or PS Elements (a great, affordable program for everyday users). If there is something that doesn't work quite right, let me know and I'll see if I can figure it out.
YES YES YES! Thanks Jeri! I can definitely use this on some of our Disneyland photos.
I do want to learn how to remove a person from a photo but that might be to technical. Oh and glare off glasses. and adding words to a photo.
Thank You so much Jeri for teaching me this. It seems like I am lways having this problem and had no idea how to fix it. Now I won't be getting rid of all of my "bad" photo's.
Post a Comment