Or are you?
Today we'll go over how to alter the color of your digital embellishments. This method, while easy, may require some experimenting and you still might not come up with exactly the color you are looking for. But with a little practice you'll get pretty close and get a lot more mileage out of those digital elements.
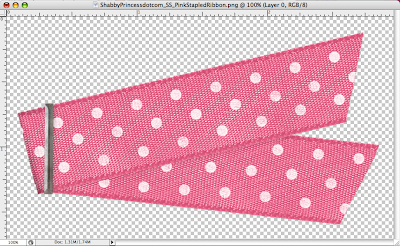 We're starting with this lovely stapled pink ribbon. Download it here if you want to practice. It's called Sweet Sprinkles created by ShabbyPrincess and you can look at all their stuff at shabbyprincess.com if you like it. I like these elements that come as .png (pronounced 'ping') because the background is transparent (that's what the gray boxes mean). If you saved it as a .jpg, you would have a white box around your ribbon and that's a pain.
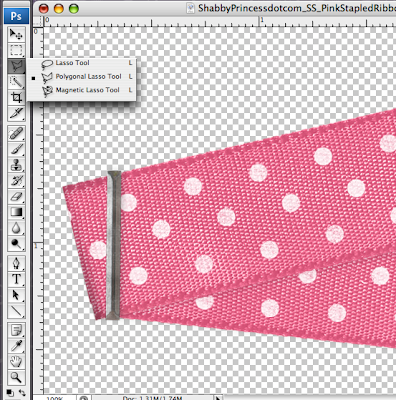
This method changes the color of the entire layer and I want that staple to stay gray. So first, I'm going to isolate it this way. Select your lasso tool (shown below) and make sure you are using the 'polygonal lasso'. That means that every time you click, it will make a line from one point to the next, making some sort of polygon when you're done. Obviously this would be harder with a more intricate shape. You'll get better at it with practice. And if you get excited and select the wrong thing, Crtl/Cmmd D will de-select your area so you can start over.
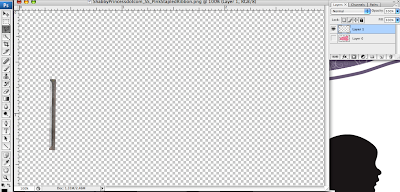
 Once your staple is selected, simply copy (Crtl/Cmmd C) and paste (Crtl/Cmmd V) the selection. It will create a new layer. Remember that the layers are listed in order. The staple must be on top of the ribbon in the Layers Palette if you want it to show up on top in the image.
Turn off the lower layer (click the eyeball on the bottom layer) so you can see if you copied it right and you don't have any pink ribbon attached to it. If it's messed up, drag your staple layer into the little trash can (lower right of the Layers Palette) and start over.
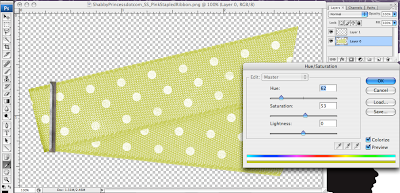
 Moving on. Turn your pink ribbon layer back on and make sure you're clicked into that layer so you can work on it. Go to Image -> Adjustments -> Hue/Saturation. Just start moving the Hue slider back and forth. You can lighten or deepen the color by moving the Saturation or Lightness bars. Also try clicking on the "Colorize" checkbox on the lower right and see what happens with those settings. When you've discovered the color that you want to use, just click OK.
 Now you need to make your still-gray staple a part of the image again. Click Layers -> Flatten Image to make it all one piece again.
 Surprisingly easy yes? Add your fancy new ribbons to the project of your choice. Leave comments if you have questions.







1 comment:
What an awesome photoshop trick!!! I can use this one over and over and over again! Thanks Jeri!
Post a Comment